

- 1
- 2
- 3
- 4
- 5
- 6
- 7
- 8
- 9
- 10
- 11
- 12
- 13
- 14
- 15
- 16
- 17
- 18
- Scorecard
Hole 1
Men's Handicap: 11 Women's Handicap: 7 Par: 4
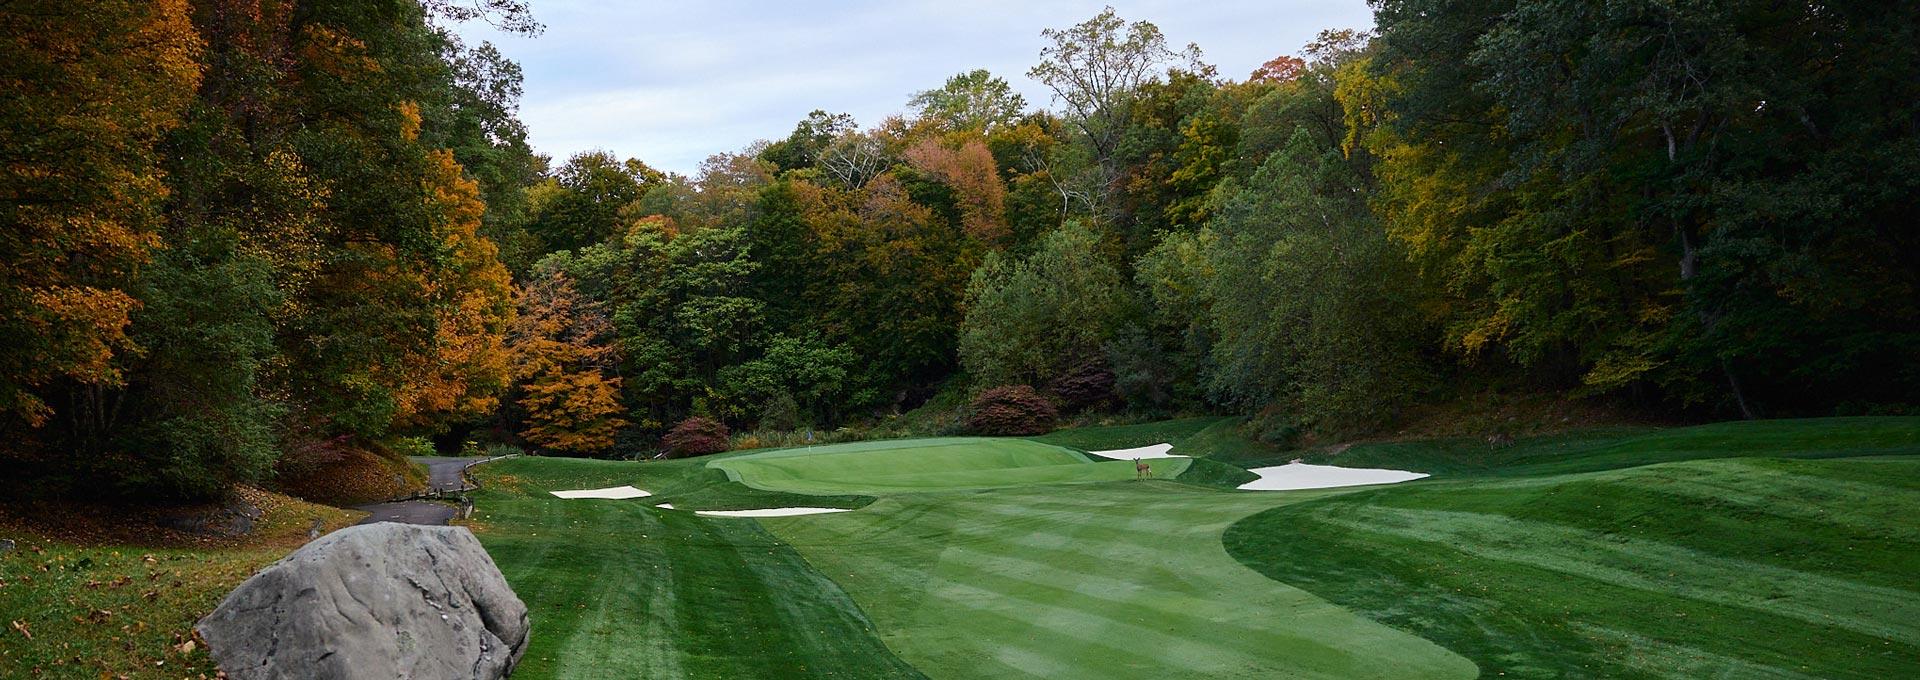
Hole 1 is a dog leg right that gives you a great view of the Clubhouse. It is the 11th handicap hole and an excellent start to your round. The tee shot should be played to the left side of the fairway, which slopes significantly from left to right. The bunker on the right is very much in play and takes a drive of 260 yards to carry. The second shot is normally hit from a side hill lie to a green that is well protected by bunkers. However, in making your second shot you need to make sure that you do not hit your approach to the right of the green as this area slopes severely downhill to out-of-bounds. Once on the green, it has numerous slopes and can have surprisingly quick putts down grain.

Hole 2
Men's Handicap: 15 Women's Handicap: 15 Par: 4
Hole 2 is a great example of a tough short par 4. It is the 15th handicap hole. Being downhill from the tee you may be tempted to go for the green, but this presents a daunting tee shot that can easily find itself snagged by the trees that guard the right side of the fairway. You are almost always better to hit to the left of the fairway bunker which will require about a 200 yard shot. From there you will have a short approach shot. The green slopes fairly severely from back to front and any putt above the hole will be quick. The green itself is also physically very hard and an approach shot that is not struck crisply can bound off the green to the out-of-bounds just behind the green.

Hole 3
Men's Handicap: 13 Women's Handicap: 5 Par: 5
Hole 3 is a relatively short par five that is the 13th handicap hole. The tee shot invites you to cut the corner by attempting to hit over the two bunkers that protect the inside of this dog leg left hole. The bunkers require about a 240 yard shot to clear but is rewarded with a reachable uphill shot to a green that has sand very much in play and out-of-bounds for a shot that is wide and right. Once your ball is on the green you may be faced with one of the many interesting pin placements that invites three putts due to its slopes and two-tiered design.
Hole 4
Men's Handicap: 17 Women's Handicap: 17 Par: 3
Hole 4 being substantially downhill, it plays about one club shorter then its distance. It is the 17th handicap hole. It was recently rebuilt to its original “fort” hole configuration, which means that it is essentially a significantly elevated hole that is protected by bunkers on all sides. If you can, avoid the deep bunker on the left as it represents an extreme challenge for even the most skilled sand player to get up and down. However, if your tee shot does find the green, your work may just be starting due to the green’s numerous slopes and subtle breaks. As with many of the greens, any putt above the hole will prove daunting.

Hole 5
Men's Handicap: 5 Women's Handicap: 3 Par: 4
It is often said that the golf course starts at Hole 5, a difficult and long par four that is the number one handicap hole from the blue tees, where your tee shot needs to carry 250 yards to get over the hill and give you a reasonable second shot on this 453 yard hole. The woods on the left side are friendly and most times return a tee shot hit into them. However, the woods on the right are a lateral hazard from which good things rarely happen. So favor the left side. Even after a successful tee shot your approach has to clear a deep bunker on the left to this challenging green. Then once on the green, you may be surprised by its difficulty. It is probably the second most difficult green on the golf course due to its subtle breaks.

Hole 6
Men's Handicap: 7 Women's Handicap: 9 Par: 3
The par 5 sixth has 3 different tiers that generally slope downhill to the green. Chose between a layup (230 from blue, 200 from white) or add an extra 40 yards to get to the 2nd plateau. Anything in between could leave a downhill, sidehill lie in heavy rough. The safe 2nd shot is to hit a layup to about the 120 yard mark from where you can attack the green. The alternate is to hit to the 3rd tier bringing the right side out-of-bounds into play. A 2nd tier tee shot leaves 240 yards that has to be played over the right side out-of-bounds to get to the green. If the pin is in the middle hollow of the green a good approach shot can get close. A front right or back shelf pin requires an accurate approach for a makeable birdie putt.
Hole 7
Men's Handicap: 1 Women's Handicap: 1 Par: 4
The par 4 seventh plays quite a bit longer than its yardage. The tee shot must carry the legendary pond where “Steam-shovel” Banks allegedly lost his steam-shovel during construction of this hole. You are best served by hitting your tee shot as close as you dare along the right edge of the left tree line, leaving an uphill shot that plays two clubs longer than its distance. Anything that is short of the green will roll back down the steep slope that fronts the green. The green itself is in a classic “punchbowl” configuration, where all of the sides slope in towards the green surface. The green itself has two well defined levels, with a pin on the top left shelf almost always presenting a test of your putting skills.
Hole 8
Men's Handicap: 8 Women's Handicap: 11 Par: 3
The par 3 eighth is a classic Biarritz hole playing from 155 to 220 yards. It has one of the prettiest views that you will experience at the Club and is considered one of Charles Bank’s masterpieces. It is a unique green with a significant and pinable swale in the middle. It is very similar to par threes that he constructed at Mid-Ocean and Yale Golf Club. Note the beautiful waterfall that presents a picturesque backdrop and is complimented by the four sand bunkers that protect the sides of this green. If the pin is on the back tier, the tee shot must carry all the way as the swale absorbs the energy from a slightly mishit shot. If you are lucky enough to find the green on your tee shot, you will be rewarded with a reasonable putt.
Hole 9
Men's Handicap: 3 Women's Handicap: 13 Par: 4
The par 4 ninth runs plays uphill from tee to green, playing at least 35 yards longer than its distance. From the blue tees, a 240 yard carry shot will reach the right fairway plateau. If the prevailing wind is in your face you may want to consider hitting to the lower tier on the left, leaving a blind approach shot that plays a club or two extra. A bottom right pin position on the green may look inviting but is fraught with peril. A wayward shot to this pin can find the deep bunker in front, playable but in the woods on the left, or from the valley over the green. As you walk off the green make sure to look back down the hole as on a clear day you may see New York City, which is about 35 miles away.

Hole 10
Men's Handicap: 10 Women's Handicap: 8 Par: 4
The back nine begins on the elevated tee of the par four 10th Hole. The blue tees overlooking fairway and green invite a "grip it and rip it" drive as only a shot hooked to the left presents problems. The approach will generally call for a mid-iron to a green protected by out- of- bounds right, a deep bunker front right and a tough bunker on the left hillside.

Hole 11
Men's Handicap: 16 Women's Handicap: 16 Par: 3
Hole 11 Par 3 Handicap Men: 16 Women: 16 196 180 137 118 Should the tee shot clear the pond it must still avoid the deep sand traps on the left front and right side of the green. From the right trap it is nearly impossible even to stop the ball on this steeply sloped back to front green let alone put it near the pin!

Hole 12
Men's Handicap: 4 Women's Handicap: 4 Par: 4
The tee shot must avoid the woods lining the right side of the fairway. The second shot is to a green positioned on top of a knoll. An approach shot that is to the right of the green is generally lost in the woods. There seem to be a wide variety of difficult pitch/chip shots that challenge the player on this classic golf hole.
Hole 13
Men's Handicap: 14 Women's Handicap: 14 Par: 4
An aggressive try for the green on the tee shot rarely pays dividends; should the ball reach the green it will usually not come to rest there. The better strategy is to hit a 200-yard shot to the right of the bunker on the elbow of the slight dogleg left. From this position it is a short approach to the green.
Hole 14
Men's Handicap: 2 Women's Handicap: 6 Par: 4
This par four measuring 466 yards from the blue tees is the #2 handicap hole. The tee shot immediately forces a decision whether to play straight away or to head left to the wider section of the fairway. If played to the right the tee shot must travel at least 250 yards or face an approach from a steep downhill lie to the elevated green.
Hole 15
Men's Handicap: 12 Women's Handicap: 10 Par: 4
The tee shot is blind, so the best play is towards the white marker pole, which stands behind the green marking its location. A well struck ball that carries 240 yards will benefit by rolling down the slope leaving only a sand wedge approach to this precarious sand-protected green.

Hole 16
Men's Handicap: 8 Women's Handicap: 2 Par: 5
"Freddie’s Turn", the tee shot should be placed over the left side bunkers since the fairway slopes from left to right A tee shot with even a minimum of slice spin may well jump the out-of –bounds which extends the entire length of the right side of the fairway.

Hole 17
Men's Handicap: 18 Women's Handicap: 18 Par: 3
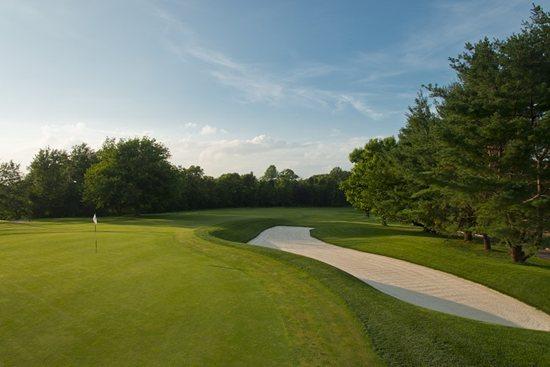
Hole 17 is a classic "Redan" hole featuring a flat approach to half the green and deep bunkers waiting to catch an errant tee shot to this 158-yard par three. Although a far-left pin position may look inviting, the safer shot is to the middle of this tricky green, take two putts and "Get out of Dodge!"

Hole 18
Men's Handicap: 6 Women's Handicap: 12 Par: 4
The home hole is a 432-yard beauty. The drive from the elevated tee should favor the right towards the fairway bunker 260 yards away. A shot to the left side of the fairway may not leave a reasonable approach. A good tee shot will leave a lengthy approach to the uphill green, again requiring one more club than its apparent distance.

Scorecard
| HOLE | 1 | 2 | 3 | 4 | 5 | 6 | 7 | 8 | 9 | OUT | 10 | 11 | 12 | 13 | 14 | 15 | 16 | 17 | 18 | IN | TOTALS |
|---|---|---|---|---|---|---|---|---|---|---|---|---|---|---|---|---|---|---|---|---|---|
| Blue 72.7/142 | 374 | 347 | 477 | 157 | 455 | 538 | 425 | 196 | 379 | 3348 | 406 | 193 | 419 | 320 | 440 | 368 | 551 | 154 | 437 | 3288 | 6636 |
| White 71.1/139 | 369 | 325 | 456 | 138 | 390 | 516 | 416 | 188 | 362 | 3160 | 376 | 182 | 404 | 313 | 432 | 354 | 539 | 147 | 420 | 3167 | 6327 |
| Green 70.4/134 | 369 | 325 | 456 | 138 | 373 | 48 | 398 | 180 | 332 | 3069 | 360 | 170 | 379 | 313 | 393 | 330 | 527 | 147 | 398 | 3017 | 6086 |
| Yellow 66.4/122 | 324 | 312 | 433 | 119 | 352 | 446 | 323 | 129 | 262 | 2700 | 350 | 119 | 323 | 205 | 385 | 301 | 469 | 128 | 382 | 2662 | 5362 |
| Red (Ladies) 73.1/140 | 328 | 318 | 440 | 128 | 357 | 453 | 365 | 175 | 267 | 2831 | 355 | 139 | 331 | 291 | 390 | 306 | 475 | 141 | 398 | 2826 | 5657 |
| PAR | 4 | 4 | 5 | 3 | 4 | 5 | 4 | 3 | 4 | 36 | 4 | 3 | 4 | 4 | 4 | 4 | 5 | 3 | 4 | 35 | 71 |
| Men's Handicap | 11 | 15 | 13 | 17 | 5 | 7 | 1 | 9 | 3 | 10 | 16 | 4 | 14 | 2 | 12 | 8 | 18 | 6 | |||
| Women's Handicap | 7 | 15 | 5 | 17 | 3 | 9 | 1 | 11 | 13 | 8 | 16 | 4 | 14 | 6 | 10 | 2 | 18 | 12 |